概要
Raspberry Pi に Web カメラを付けて、認識・撮影テストをします :)
準備するもの
Raspberry Pi
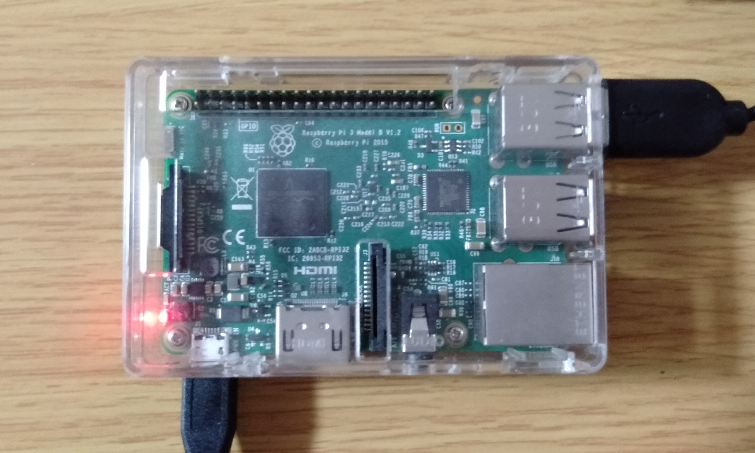
- Raspberry Pi 3 Model B
https://www.raspberrypi.org/products/raspberry-pi-3-model-b/

- 実物はこんな感じです
- 使用している OS
$ cat /etc/os-release
PRETTY_NAME="Raspbian GNU/Linux 10 (buster)"
NAME="Raspbian GNU/Linux"
VERSION_ID="10"
VERSION="10 (buster)"
VERSION_CODENAME=buster
ID=raspbian
ID_LIKE=debian
HOME_URL="http://www.raspbian.org/"
SUPPORT_URL="http://www.raspbian.org/RaspbianForums"
BUG_REPORT_URL="http://www.raspbian.org/RaspbianBugs"
Web カメラ
https://www.logicool.co.jp/ja-jp/products/webcams/hd-webcam-c310n.960-001264.html
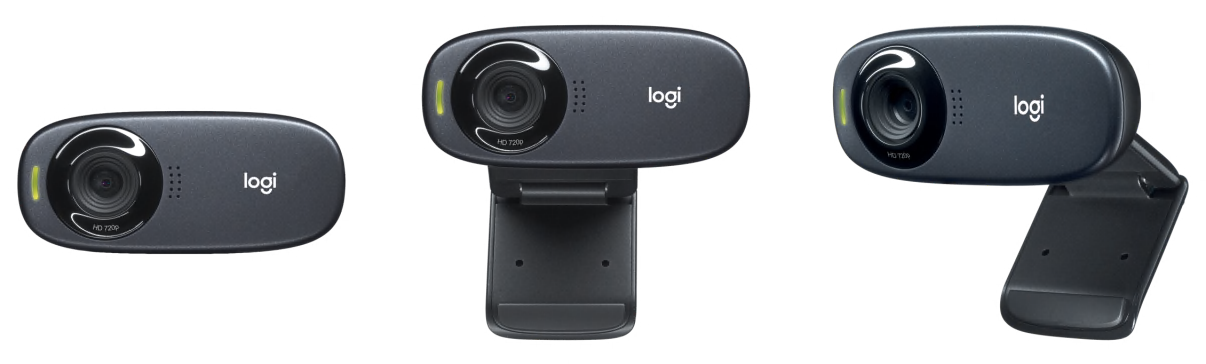
- 実物はこんな感じです
実装
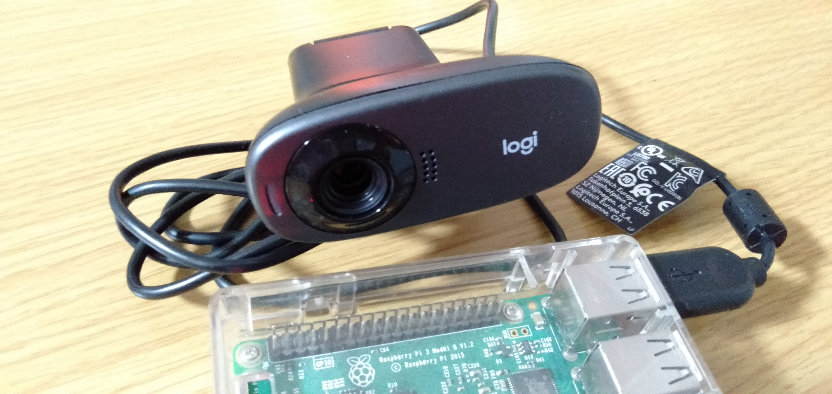
USB 接続する
兎にも角にも Web カメラを Raspberry Pi に USB 接続します
特に注意点はありません ;)
USB 接続を CLI から確認する
- 以下のコマンドを使用して USB 接続を確認します
lsusb
### 例 USB 接続する前

$ lsusb
Bus 001 Device 003: ID 0424:ec00 Standard Microsystems Corp. SMSC9512/9514 Fast Ethernet Adapter
Bus 001 Device 002: ID 0424:9514 Standard Microsystems Corp. SMC9514 Hub
Bus 001 Device 001: ID 1d6b:0002 Linux Foundation 2.0 root hub
### 例 USB 接続した後

$ lsusb
Bus 001 Device 004: ID 046d:081b Logitech, Inc. Webcam C310         <---- 追加された
Bus 001 Device 003: ID 0424:ec00 Standard Microsystems Corp. SMSC9512/9514 Fast Ethernet Adapter
Bus 001 Device 002: ID 0424:9514 Standard Microsystems Corp. SMC9514 Hub
Bus 001 Device 001: ID 1d6b:0002 Linux Foundation 2.0 root hub
---> USB 接続は正常に出来ていることが分かりました
デバイスファイルが作成されているか確認する
- サーバ上に USB カメラのデバイスファイルが作成されている方を確認します
ls -la /dev/video*
### 例 USB 接続する前

$ ls -la /dev/video*
crw-rw----+ 1 root video 81, 4 May  3 11:03 /dev/video10
crw-rw----+ 1 root video 81, 5 May  3 11:03 /dev/video11
crw-rw----+ 1 root video 81, 6 May  3 11:03 /dev/video12
crw-rw----+ 1 root video 81, 0 May  3 11:03 /dev/video13
crw-rw----+ 1 root video 81, 1 May  3 11:03 /dev/video14
crw-rw----+ 1 root video 81, 2 May  3 11:03 /dev/video15
crw-rw----+ 1 root video 81, 3 May  3 11:03 /dev/video16
### 例 USB 接続した後

$ ls -la /dev/video*
crw-rw----+ 1 root video 81, 9 May  3 11:26 /dev/video0         <---- 追加された
crw-rw----+ 1 root video 81, 8 May  3 11:26 /dev/video1         <---- 追加された
crw-rw----+ 1 root video 81, 4 May  3 11:03 /dev/video10
crw-rw----+ 1 root video 81, 5 May  3 11:03 /dev/video11
crw-rw----+ 1 root video 81, 6 May  3 11:03 /dev/video12
crw-rw----+ 1 root video 81, 0 May  3 11:03 /dev/video13
crw-rw----+ 1 root video 81, 1 May  3 11:03 /dev/video14
crw-rw----+ 1 root video 81, 2 May  3 11:03 /dev/video15
crw-rw----+ 1 root video 81, 3 May  3 11:03 /dev/video16
---> /dev/video0 と /dev/video1 が作成されていれば、OK です
Web カメラで写真を撮影をする
- CLI で Web カメラを実行するために、
fswebcamコマンドをインストールします
sudo apt update
sudo apt install -y fswebcam
- 写真を撮影をします
mkdir ~/camera-test
cd ~/camera-test
fswebcam image.jpg
### 例

$ fswebcam image.jpg
--- Opening /dev/video0...
Trying source module v4l2...
/dev/video0 opened.
No input was specified, using the first.
Adjusting resolution from 384x288 to 352x288.
--- Capturing frame...
Captured frame in 0.00 seconds.
--- Processing captured image...
Writing JPEG image to 'image.jpg'.
- 写真が出来ているのを確認します
$ ls -lh
total 80K
-rw-r--r-- 1 pi pi 78K May  5 05:28 image.jpg
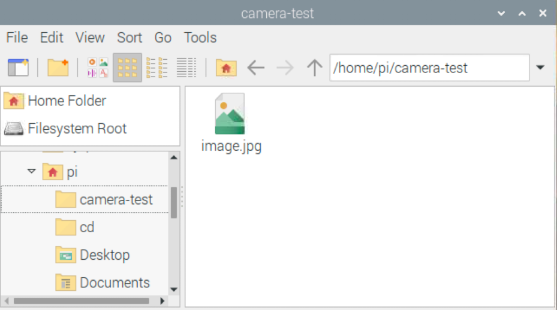
---> 基本的な使い方はこれだけです :)
注意点
fswebcam コマンドはデフォルトで /dev/video0 をソース元として指定しています
故に Web カメラを Raspberry Pi に接続した際に /dev/video0 がちゃんと作成されているか確認して下さい
また、同じ現象は Node-Red の node-red-contrib-usbcamera ノード を使った際も発生しますので、しっかり確認しておいて下さい :)
Node-Red で Web カメラを使う記事も後日作成予定です ;)
おまけ
fswebcamコマンドのオプションを調べます- かなり多機能なのでこれだけでもいろいろ出来そうですね :)
$ fswebcam --help
Usage: fswebcam [<options>] <filename> [[<options>] <filename> ... ]

 Options:

 -?, --help                   Display this help page and exit.
 -c, --config <filename>      Load configuration from file.
 -q, --quiet                  Hides all messages except for errors.
 -v, --verbose                Displays extra messages while capturing
     --version                Displays the version and exits.
 -l, --loop <seconds>         Run in loop mode.
 -b, --background             Run in the background.
 -o, --output <filename>      Output the log to a file.
 -d, --device <name>          Sets the source to use.
 -i, --input <number/name>    Selects the input to use.
 -t, --tuner <number>         Selects the tuner to use.
 -f, --frequency <number>     Selects the frequency use.
 -p, --palette <name>         Selects the palette format to use.
 -D, --delay <number>         Sets the pre-capture delay time. (seconds)
 -r, --resolution <size>      Sets the capture resolution.
     --fps <framerate>        Sets the capture frame rate.
 -F, --frames <number>        Sets the number of frames to capture.
 -S, --skip <number>          Sets the number of frames to skip.
     --dumpframe <filename>   Dump a raw frame to file.
 -s, --set <name>=<value>     Sets a control value.
     --revert                 Restores original captured image.
     --flip <direction>       Flips the image. (h, v)
     --crop <size>[,<offset>] Crop a part of the image.
     --scale <size>           Scales the image.
     --rotate <angle>         Rotates the image in right angles.
     --deinterlace            Reduces interlace artifacts.
     --invert                 Inverts the images colours.
     --greyscale              Removes colour from the image.
     --swapchannels <c1c2>    Swap channels c1 and c2.
     --no-banner              Hides the banner.
     --top-banner             Puts the banner at the top.
     --bottom-banner          Puts the banner at the bottom. (Default)
     --banner-colour <colour> Sets the banner colour. (#AARRGGBB)
     --line-colour <colour>   Sets the banner line colour.
     --text-colour <colour>   Sets the text colour.
     --font <[name][:size]>   Sets the font and/or size.
     --no-shadow              Disables the text shadow.
     --shadow                 Enables the text shadow.
     --title <text>           Sets the main title. (top left)
     --no-title               Clears the main title.
     --subtitle <text>        Sets the sub-title. (bottom left)
     --no-subtitle            Clears the sub-title.
     --timestamp <format>     Sets the timestamp format. (top right)
     --no-timestamp           Clears the timestamp.
     --gmt                    Use GMT instead of local timezone.
     --info <text>            Sets the info text. (bottom right)
     --no-info                Clears the info text.
     --underlay <PNG image>   Sets the underlay image.
     --no-underlay            Clears the underlay.
     --overlay <PNG image>    Sets the overlay image.
     --no-overlay             Clears the overlay.
     --jpeg <factor>          Outputs a JPEG image. (-1, 0 - 95)
     --png <factor>           Outputs a PNG image. (-1, 0 - 10)
     --save <filename>        Save image to file.
まとめ
Raspberry Pi に Web カメラを接続し、写真の撮影をするやり方を書きました
途中使用した fswebcam コマンドも多機能なので、これから色々使ってみたいと思います
Have fun !! :)