AKS クラスターに新しい機能が追加されたようなので、試してみました!!
公式ドキュメント
Add a spot node pool to an Azure Kubernetes Service (AKS) cluster
情報元
Spot VMSS Node Pool きたぞ / Preview - Add a spot node pool to an Azure Kubernetes Service (AKS) cluster - Azure Kubernetes Service | Microsoft Docs https://t.co/rxZ3x2RGvT
— Toru Makabe (@tmak_tw) February 28, 2020
結論
AKS に spot node pool が使えるようになり、これが AKS の運用においてコスト削減に繋がるとのことです。
spot node pool というのは、Spot VMs[1] を用いた virtual machine scale set (vmss) [2] であり、コスト削減というのはこの Spot VMs を使うからです。
⚠ 注意事項
- 2020/02/29 の時点では今回取り上げる Spot VMs 等はプレビュー段階のため、GA時にはコマンドや実行状況などは変わる可能性があります。
- プレビュー版故に SLA は無いので、開発環境であっても自己責任で使用して下さい。
- SpotVM の制約として、vmss は single fault domain[3] のみで可能なため、HA 構成を設定することが出来ません[4]
- Azure 側にて、リソースが必要になった場合は、SpotVM は優先的にリソースを奪われるようです。
実際に構築してみる
手順は 2 個です。
順番にやっていきましょう!! 🙌
サブスクリプションの作成とプレビュー機能の有効化
spotpoolpreview preview 機能を使えるようにする
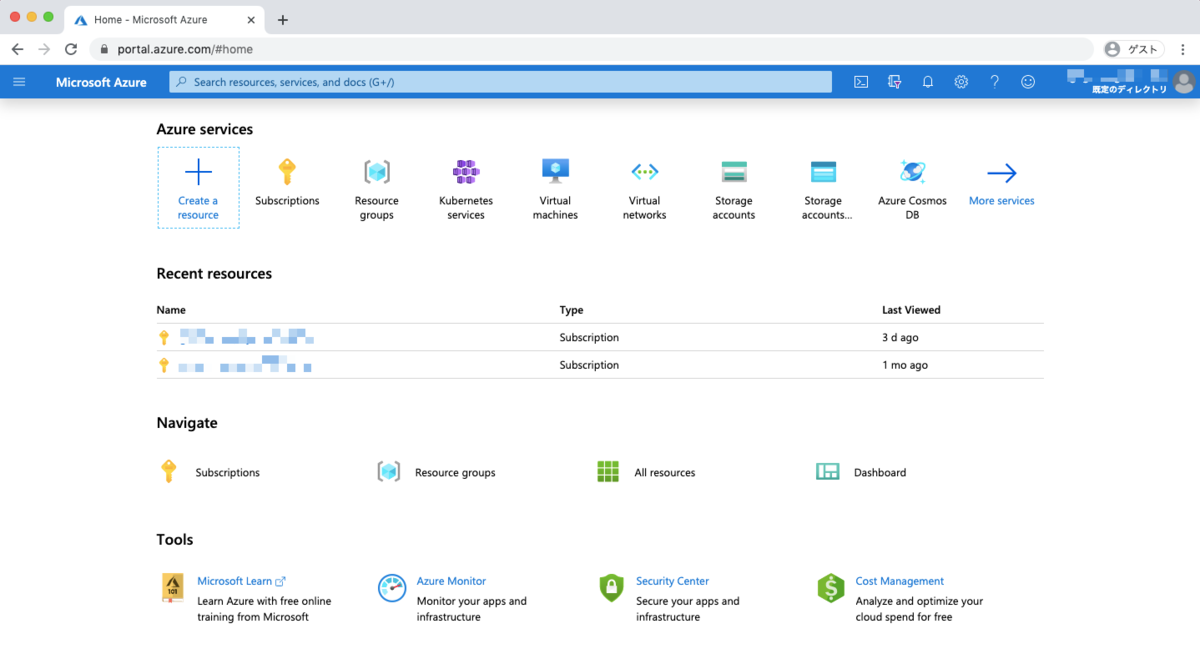

- 今回の検証用に作成し、iganar-aks-test-20200229 とリネームしたものを使っていきます。
az account list --output table
# az account list --output table
Name                        CloudName    SubscriptionId             State    IsDefault
--------------------------  -----------  -------------------------  -------  -----------
iganari-hogehoge            AzureCloud   zzzzzzzzzzzzzzzzzzzzzzzzz  Enabled  True
iganari-hugahuga            AzureCloud   yyyyyyyyyyyyyyyyyyyyyyyyy  Enabled  False
iganar-aks-test-20200229    AzureCloud   xxxxxxxxxxxxxxxxxxxxxxxxx  Enabled  False
- Default にセットしていない場合は az account set コマンドを使います。
az account set --subscription ${SubscriptionId}
# az account list --output table
Name                        CloudName    SubscriptionId             State    IsDefault
--------------------------  -----------  -------------------------  -------  -----------
iganari-hogehoge            AzureCloud   zzzzzzzzzzzzzzzzzzzzzzzzz  Enabled  False
iganari-hugahuga            AzureCloud   yyyyyyyyyyyyyyyyyyyyyyyyy  Enabled  False
iganari-aks-test-20200229   AzureCloud   xxxxxxxxxxxxxxxxxxxxxxxxx  Enabled  True
- spotpoolpreview preview を登録します。
今回の spot node pool を用いた AKS を構築するには、spotpoolpreview 機能を Subscription の中で有効にする必要があるので下記のコマンドを実行しましょう。
az feature register --namespace "Microsoft.ContainerService" --name "spotpoolpreview"
### ex

# az feature register --namespace "Microsoft.ContainerService" --name "spotpoolpreview"
Once the feature 'spotpoolpreview' is registered, invoking 'az provider register -n Microsoft.ContainerService' is required to get the change propagated
{
  "id": "/subscriptions/xxxxxxxxxxxxxxxxxxxxxxxxx/providers/Microsoft.Features/providers/Microsoft.ContainerService/features/spotpoolpreview",
  "name": "Microsoft.ContainerService/spotpoolpreview",
  "properties": {
    "state": "Registering"
  },
  "type": "Microsoft.Features/providers/features"
}
- 有効化には数分かかりますので、実行中のステータスに関しては以下のコマンドで確認出来ます。
az feature list -o table --query "[?contains(name, 'Microsoft.ContainerService/spotpoolpreview')].{Name:name,State:properties.state}"
### ex

### 実行前は何も表示されない
# az feature list -o table --query "[?contains(name, 'Microsoft.ContainerService/spotpoolpreview')].{Name:name,State:properties.state}

### 実行直後
# az feature list -o table --query "[?contains(name, 'Microsoft.ContainerService/spotpoolpreview')].{Name:name,State:properties.state}"
Name                                        State
------------------------------------------  -----------
Microsoft.ContainerService/spotpoolpreview  Registering

### 有効化完了
# az feature list -o table --query "[?contains(name, 'Microsoft.ContainerService/spotpoolpreview')].{Name:name,State:p
roperties.state}"
Name                                        State
------------------------------------------  ----------
Microsoft.ContainerService/spotpoolpreview  Registered
- 上記のコマンドの State が Registered になったら、下記のコマンドで登録情報を更新します。
- az provider register コマンドを使用して、Microsoft.ContainerServiceリソースプロバイダーの登録を更新しています。
az provider register --namespace Microsoft.ContainerService
---> ここまでの作業で spotpoolpreview preview 機能を使えるようになりました!! 🚀
Install aks-preview CLI extension
spot node pool を用いた AKS クラスタを CLI から作成する場合、aks-preview CLI extension の version 0.4.32 以降が必要になります。
az extension add コマンドを使用して、aks-preview Azure CLI extension をインストールし、az extension update コマンドを使用して更新を確認しましょう。
az extension add --name aks-preview
az extension update --name aks-preview
---> ここで AKS を作る準備が出来ました!! 🚀
Add a spot node pool to an AKS cluster
複数のノードプールが有効になっている AKS クラスタを作成する
- リソースグループの作成をします。
az group create --name my-Resource-Group --location eastus
az aks create \
    --resource-group my-Resource-Group \
    --name iganariAKSCluster \
    --vm-set-type VirtualMachineScaleSets \
    --node-count 2 \
    --generate-ssh-keys \
    --kubernetes-version 1.15.7 \
    --load-balancer-sku standard
- 比較のために node pool を追加しておきましょう。
az aks nodepool add \
    --resource-group my-Resource-Group \
    --cluster-name iganariAKSCluster \
    --name nodepoolno \
    --node-count 3 \
    --kubernetes-version 1.15.5 \
    --no-wait
spot node pool を追加します。
- 下記のコマンドにて追加することが出来ます。
--priority Spot及び、--enable-cluster-autoscalerのオプションが付いていることが分かります。
az aks nodepool add \
    --resource-group my-Resource-Group \
    --cluster-name iganariAKSCluster \
    --name nodepoolspot \
    --priority Spot \
    --eviction-policy Delete \
    --spot-max-price -1 \
    --enable-cluster-autoscaler \
    --min-count 1 \
    --max-count 3 \
    --no-wait
AKS の状態を確認しましょう。
- CLI にて確認していきましょう。
# az aks nodepool list --resource-group my-Resource-Group --cluster-name iganariAKSCluster -o table
The behavior of this command has been altered by the following extension: aks-preview
Name          OsType    VmSize           Count    MaxPods    ProvisioningState
------------  --------  ---------------  -------  ---------  -------------------
nodepool1     Linux     Standard_DS2_v2  2        110        Succeeded
nodepoolno    Linux     Standard_DS2_v2  3        110        Succeeded
nodepoolspot  Linux     Standard_DS2_v2  3        110        Succeeded
- ポータルからも確認してみましょう。

---> これで spot node pool を用いた AKS の構築自体は完了です!! 🚀
サンプルプログラムを配置してみる
実際に動くサンプルアプリケーションを用いて挙動を確認してみましょう。
サンプルアプリケーションは公式のものを使用します。
- まずは AKS との認証を行います。
az aks get-credentials --resource-group my-Resource-Group --name iganariAKSCluster
Azure の公式ドキュメントに載っているサンプルの YAML をすこし改良してみます。
- sample.yaml
kind: Namespace
apiVersion: v1
metadata:
  name: sample-vote
  labels:
    name: sample-vote

---

apiVersion: apps/v1beta1
kind: Deployment
metadata:
  name: azure-vote-back
  namespace: sample-vote
spec:
  replicas: 1
  template:
    metadata:
      labels:
        app: azure-vote-back
    spec:
      nodeSelector:
        "beta.kubernetes.io/os": linux
      containers:
      - name: azure-vote-back
        image: redis
        ports:
        - containerPort: 6379
          name: redis
      tolerations:
      - key: "kubernetes.azure.com/scalesetpriority"
        operator: "Equal"
        value: "spot"
        effect: "NoSchedule"

---

apiVersion: v1
kind: Service
metadata:
  name: azure-vote-back
  namespace: sample-vote
spec:
  ports:
  - port: 6379
  selector:
    app: azure-vote-back

---

apiVersion: apps/v1beta1
kind: Deployment
metadata:
  name: azure-vote-front
  namespace: sample-vote
spec:
  replicas: 1
  strategy:
    rollingUpdate:
      maxSurge: 1
      maxUnavailable: 1
  minReadySeconds: 5
  template:
    metadata:
      labels:
        app: azure-vote-front
    spec:
      nodeSelector:
        "beta.kubernetes.io/os": linux
      containers:
      - name: azure-vote-front
        image: microsoft/azure-vote-front:v1
        ports:
        - containerPort: 80
        resources:
          requests:
            cpu: 250m
          limits:
            cpu: 500m
        env:
        - name: REDIS
          value: "azure-vote-back"
      tolerations:
      - key: "kubernetes.azure.com/scalesetpriority"
        operator: "Equal"
        value: "spot"
        effect: "NoSchedule"
---

apiVersion: v1
kind: Service
metadata:
  name: azure-vote-front
  namespace: sample-vote
spec:
  type: LoadBalancer
  ports:
  - port: 80
  selector:
    app: azure-vote-front
- kubectl コマンドを持ちいて、デプロイしましょう。
kubectl create -f sample.yaml
- デプロイ後に Pod を確認してみましょう。
- spot node pool 上に Pod が作成出来たのが確認出来ます。
kubectl get po --namespace=sample-vote -o wide
# kubectl get po --namespace=sample-vote -o wide
NAME                                READY   STATUS    RESTARTS   AGE     IP           NODE                                   NOMINATED NODE   READINESS GATES
azure-vote-back-79ccd5b979-qh4bw    1/1     Running   0          8m14s   10.244.7.2   aks-nodepoolspot-20405705-vmss000000   <none>           <none>
azure-vote-front-559d85d4f7-898wz   1/1     Running   0          105s    10.244.4.2   aks-nodepoolno-20405705-vmss000000     <none>           <none>
- 外部 IP アドレスの確認をします。
# kubectl get service --namespace=sample-vote
NAME               TYPE           CLUSTER-IP     EXTERNAL-IP    PORT(S)        AGE
azure-vote-back    ClusterIP      10.0.236.31    <none>         6379/TCP       8m19s
azure-vote-front   LoadBalancer   10.0.113.113   40.71.235.54   80:32604/TCP   8m17s
- http://40.71.235.54 にアクセスしてみます。
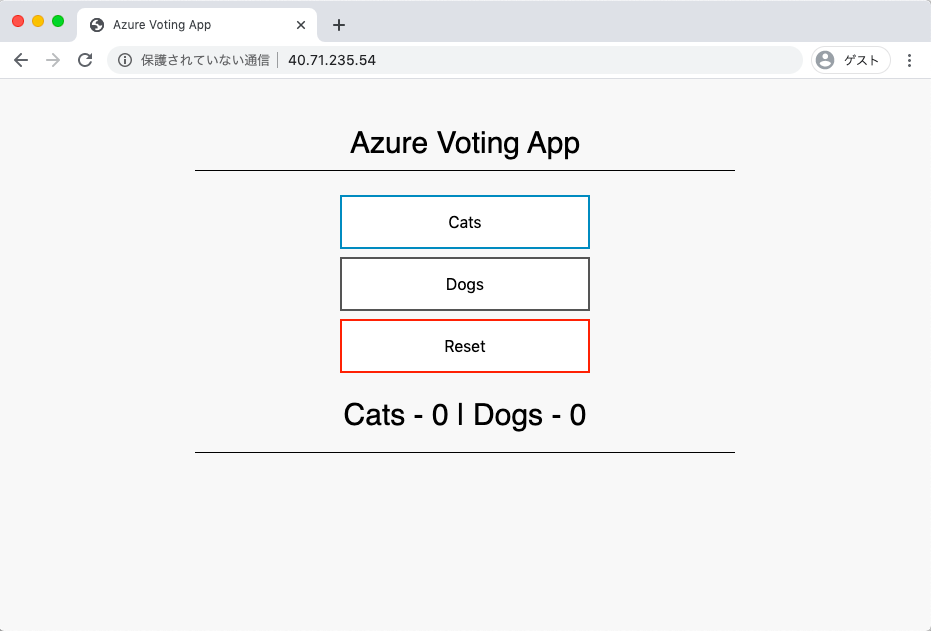
---> ちゃんと起動して、かつ動くことを確認出来ました!! 🚀
削除コマンド
検証が完了した後にはリソースの解放をしておきましょう。
kubectl delete -f sample.yaml
for i in nodepoolno nodepoolspot ;
  do \
    az aks nodepool delete \
      --resource-group my-Resource-Group \
      --cluster-name iganariAKSCluster \
      --name $i ;
  done
az aks delete \
    --resource-group my-Resource-Group \
    --name iganariAKSCluster
az group delete \
    --name my-Resource-Group
---> これでリソースの解放も完了です!! 💪
まとめ
AKS の新しい機能である、spot node pool を使った AKS を構築し、その上に Pod を配置して、ブラウザでアプリケーションの動作確認を取るところまで確認出来ました。
ほぼ、CLI からの操作で簡単に行えるので操作感的には問題ないかと思います。
また、マニュフェストファイルへの追加事項も多くないので、一度書いてしまえばそこまで苦ではありません。
一点、疑問が残るのですが、Spot VMs を使っていること自体を確認するパラメータが今の所見つからないので、名前等で判別出来るようにしておかないといけないのか??と思っています 🤔
さすがにそれは無いと思いますが…
また spot node pool 及び、Spot VMs を使うに当たっていくつかの制約があるので、この機能を使う前に併せて読んでおいたほうが良さそうです。[5]
というとこで、今回の検証は終わりになります。
引き続き、AKS の進化を楽しんでいきましょう!!
Have fun !! :)
参考
[1] Use Spot VMs in Azure
[2] Azure Spot VMs for virtual machine scale sets
[3] Fault domains
[4] Virtual Machine Scale Sets
[5] Add a spot node pool to an AKS cluster
